
 Home
Home  New products
  Promotions
  Contact Us


 Promotion
 Greenhouses


 Seeds
Seeds


 Grow tents


 Grow Lights


 Ventilation and Climate


 Roothold and growing media


 Soil and Pots


 Nutrients and Supplements


 Hydroponics and Irrigation systems


 Timers and Controllers


 Measuring devices


 Scissors and Trimmers


 Machines and Devices


 Aaccessories
 Presents



Fresh salad greens grown on your own windowsill – you don’t need a big garden for this. Microgreens are a convenient way to get started with home growing: they take up little space and allow you to follow the entire path from seed to first harvest.
In this guide, you'll learn how to grow microgreens at home, what equipment you need, and how to avoid the most common mistakes. To get started, check out the microgreen seeds and supplies category at Urban Botaniks.

What are microgreens and how are they different from sprouts?
Microgreens, also called microgreens, are young edible plants. They are harvested after the cotyledons have opened or when the first true leaves appear. The above-ground part is cut off, leaving the roots in the growing medium.
With sprouts, the entire sprouted seed, including the root, is usually consumed. Therefore, the two methods have different requirements. Here, we focus on microgreens that grow in light after the initial germination.

What seeds to choose for your first harvest?
Start with one type in a separate tray. This will make it easier to monitor humidity and when to harvest. Use seeds intended for microgreens or sprouting for food, without treatment with disinfectants. Check the label on the specific package.
For a fresh, slightly sweet taste, you can choose Pea Tendril pea seeds – 700 g . The variety is intended for microplants with characteristic fine whiskers. For a spicy accent, consider "China Rose" radishes – 300 g , and for a milder vegetable taste – Calabrese broccoli – 150 g .
Not every edible vegetable plant is suitable for consumption as microgreens. Do not use tomatoes, potatoes, peppers, or eggplant for this purpose.

Comparison of popular microplants
| Type | Preparation | Guideline to harvest* | For beginners |
|---|---|---|---|
| Radishes | Usually without soaking | 7–15 days | Good first choice |
| Broccoli | Usually without soaking | 10–15 days | Good first choice |
| Pea Tendril | Soaking 6–10 hours depending on the product | 7–10 days depending on the product | Suitable, with pre-soaking |
| Arugula | Usually without soaking | 10–15 days | Suitable for a small test tray |
| Basil | No soaking; seeds form a gel | 16–25 days | Requires more patience |
*Approximate times from sowing under suitable conditions. Variety, temperature, light and desired size will affect growth. Follow seed instructions and assess leaf development.
What do you need?
- Suitable seeds and clean drinking water.
- A shallow container with drainage and a substrate tray or a special system for microplants.
- Fresh substrate or growing medium.
- Sprayer for initial humidification.
- Bright place or suitable plant lighting.
- Clean harvesting shears.
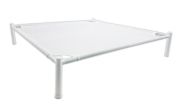
A practical option is the Microgreens Tray Set with Mesh and Lid . It includes a bottom water tray, mesh tray, lid and germination mat. For small seeds, the mat prevents them from passing through the mesh.

Soil, coconut or substrate – which should you choose?
Substrate for sowing: a convenient start is a clean, fine and air-permeable mixture with a moderate nutrient content. In the category of soils and substrates , compare the purpose and composition, not just the volume of the package. Avoid heavy garden soil and mixtures with fresh manure.
Coconut substrate: Provides root support and retains moisture. For pressed products, hydrate first according to directions. Explore coconut and other substrates and choose one with appropriate characteristics for young edible plants.
Substrates: allow growing without loose soil. An example is hemp substrates for hydroponic growing – 8 pieces . Before purchasing, check the dimensions and compatibility with the container. The substrate should remain moist, without the seeds being constantly submerged.
Growing microgreens step by step
1. Prepare the container and medium
Wash the trays and work surface. Spread an even, shallow layer of substrate or place the mat. Moisten well and allow excess water to drain. Use fresh medium for a new cycle.
2. Prepare and distribute the seeds
Soak only those species that require it. For example, Pea Tendril has a recommended soaking time of 6–10 hours. Small broccoli and radish seeds are usually direct sown. Spread evenly, without clumping. The amount depends on the species and area, so follow the supplier's instructions.
3. Maintain humidity during germination
Moisten gently without moving the seeds. If using a cover, check daily and ventilate. Some crops require a short period of darkness; the duration is determined by the species and development, not a universal schedule.
4. Provide light after germination
When the plants have sprouted and are upright, remove the covering and provide light. A windowsill may be sufficient, but during the dark months watch for elongated stems and leaning towards the window.
If necessary, consider grow lights . Choose according to the area to be illuminated and the installation instructions. The distance to the leaves and the duration of illumination should be tailored to the specific lamp and crop. Lighting that is too close can also cause problems.
5. Water according to humidity
For a substrate tray, watering from below helps keep the leaves dry. Add water to the substrate tray, let the medium absorb what it needs, and remove the rest. For a mesh system, follow the instructions; the kit recommends changing the water daily. Provide air movement without strong drafts.
6. Harvest the fresh harvest
Cut the plants with clean scissors above the surface, free of roots and substrate particles. Store in a clean container in the refrigerator and wash with drinking water immediately before use. Harvest as needed to use the greens fresh.
Common mistakes and how to avoid them
- Sowing too thickly: the seeds overlap and air circulation is difficult. Reduce the amount the next time you sow.
- Constantly waterlogged environment: check drainage and reduce water.
- Elongated, pale plants: assess the light and whether the cover has been left on too long.
- Uneven germination: check the uniformity of sowing and the moisture at the edges.
- Visible mold or rot: discard the affected crop and clean the containers before trying again.
Frequently Asked Questions
Can I grow microgreens without soil?
Yes, with a suitable substrate or mesh system. It is important that the roots have support, moisture and access to air.
Are fertilizers necessary?
With a short cycle, you can often get a crop without additional fertilization. Needs depend on the crop and environment. Do not automatically add a concentrated fertilizer intended for mature plants.
How many days does it take to grow microgreens?
Some fast varieties are ready in about a week, while others require two to three weeks or more. Use the table as a guide and keep an eye on the leaves.
Will I get a second harvest from the same tray?
Most microgreens are grown for a single cutting. For predictable results, start a new crop with fresh medium.
Start with one tray
For your first attempt, choose one type of seed, a suitable container and medium. Record the date of sowing and your observations. After a successful harvest, add a second type or sow every few days according to your consumption.
Explore microgreens products at Urban Botaniks . If you are unsure about how to combine seeds, substrate, and lighting, contact our team and specify the dimensions and conditions of the growing space.


